How to Add Custom CSS in Elementor Pro | Free

Elementor is specifically designed to empower you in the creation of professional websites, all without the necessity of having an in-depth grasp of HTML and CSS. However, for those with a proficient understanding of Custom CSS in Elementor, also offers the flexibility to integrate custom CSS into your Elementor design. This comprehensive guide will take you through the process of seamlessly integrating custom CSS in Elementor, covering each step from beginning to end.
Before diving deeper into the customization process, it’s crucial to establish a fundamental understanding of Elementor.
Elementor functions as a web page builder tool, seamlessly integrated within WordPress as a plugin. A web page essentially comprises two key components: HTML and CSS. HTML serves as the markup language that governs the structural layout of a web page, while CSS operates as the style sheet language responsible for dictating the design and style of the HTML elements within the web page.
In the context of Elementor, the construction of a web page’s structure occurs when you add new elements, such as sections, containers, and widgets, to the canvas area within the Elementor editor. Each new element you introduce corresponds to the addition of a new HTML element within your web page’s framework.
Elementor Custom CSS Integration
Indeed, Elementor provides a wide array of pre-built styling options for each element, enabling you to craft a professional web page with creative designs. However, there are instances when these options may not fully meet your requirements. This is where Elementor’s flexibility shines, as it enables you to incorporate your unique styles by leveraging custom CSS in Elementor.
What Is CSS?
CSS (Cascading Style Sheets) is a web technology used for styling and formatting web content. It defines how HTML elements should look on a webpage, controlling aspects like fonts, colors, spacing, and layout. CSS separates content from presentation, making it a crucial tool for designing visually appealing and responsive websites.
- Styling Web Content: CSS is primarily used to style various elements of a web page, such as text, images, backgrounds, and layout. It gives the style to web content as a custom CSS in Elementor.
- Separation of Concerns: CSS promotes the separation of content (HTML) from presentation (styling).
- Selectors and Rules: CSS employs selectors to target specific HTML elements and apply styling rules to them.
- Cascading Nature: The “Cascading” in CSS refers to the order of precedence that styles take when multiple conflicting styles are applied to the same element.
- Reusable Styles: CSS allows the creation of reusable styles, often referred to as classes.
- Responsive Design: CSS plays a critical role in creating responsive web designs that adapt to different screen sizes and devices.
- CSS Frameworks: There are pre-built CSS frameworks, like Bootstrap and Foundation, that provide a set of pre-designed CSS styles and components to streamline web development.
Understanding the CSS Structure
In the realm of CSS (Cascading Style Sheets), it’s crucial to grasp the fundamental structure, which revolves around selectors. Selectors are the mechanisms that determine which HTML elements on a web page will be styled. Here, we delve into three primary types of selectors:
- Element Selector:
- An element selector is the most basic type. It targets all instances of a particular HTML element and applies styles uniformly. For instance, using
pas a selector will style all paragraphs on a page.
- An element selector is the most basic type. It targets all instances of a particular HTML element and applies styles uniformly. For instance, using
- Class Selector:
- A class selector, denoted by a period (.), allows you to apply styles to specific HTML elements that share the same class attribute. This enables you to create consistent styling for multiple elements without affecting others. For example,
.buttoncan be used to style all elements with the class “button.”
- A class selector, denoted by a period (.), allows you to apply styles to specific HTML elements that share the same class attribute. This enables you to create consistent styling for multiple elements without affecting others. For example,
- ID Selector:
- The ID selector is denoted by a hash (#) and is used to uniquely target a single HTML element on a page. IDs must be unique within a document, making them ideal for styling individual elements. For instance,
#headercould be used to style a unique header element.
- The ID selector is denoted by a hash (#) and is used to uniquely target a single HTML element on a page. IDs must be unique within a document, making them ideal for styling individual elements. For instance,
Understanding these CSS selectors is pivotal as you embark on customizing your Elementor designs, as they determine precisely which elements will be impacted by your custom CSS rules.
Adding Custom CSS in Elementor
When it comes to customizing your website’s appearance, Elementor provides you with the flexibility to incorporate custom CSS in Elementor to achieve the desired look and feel. Below, we’ll explore two methods for adding custom CSS in Elementor, catering to both Elementor Free and Elementor Pro users:
Elementor Free
If you’re using Elementor’s free version, you can still harness the power of custom CSS in Elementor. Here’s how:
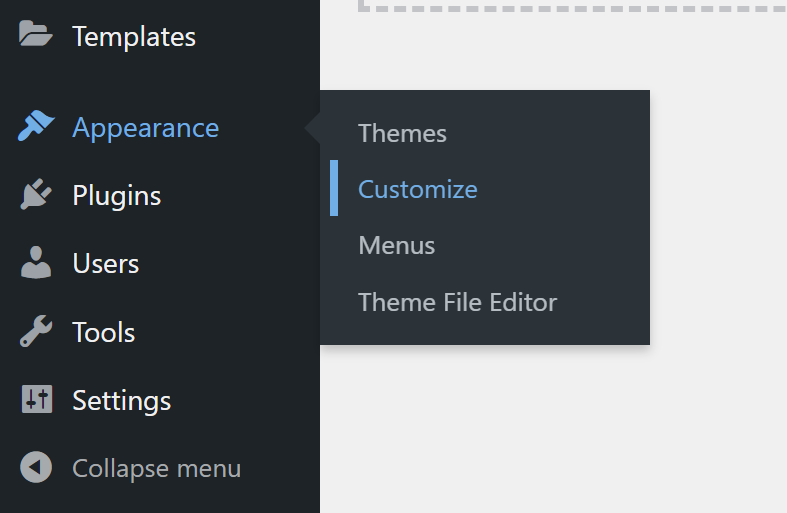
Step 1: Go to “Appearance” > Click on “Customize”.

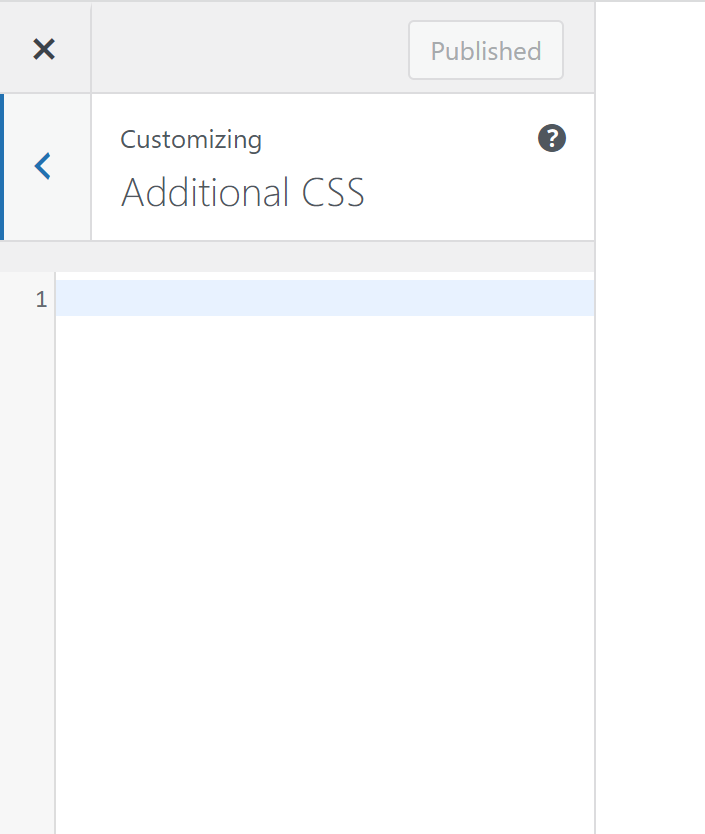
Step 2: Click on “Additional CSS”.

Step 3: Click on “Write Custom Code in Box”.

Elementor Page Builder Pro
Elementor Pro takes custom CSS in Elementor to the next level with more control and flexibility. Here’s how you can add custom CSS if you’re using paid Elementor:
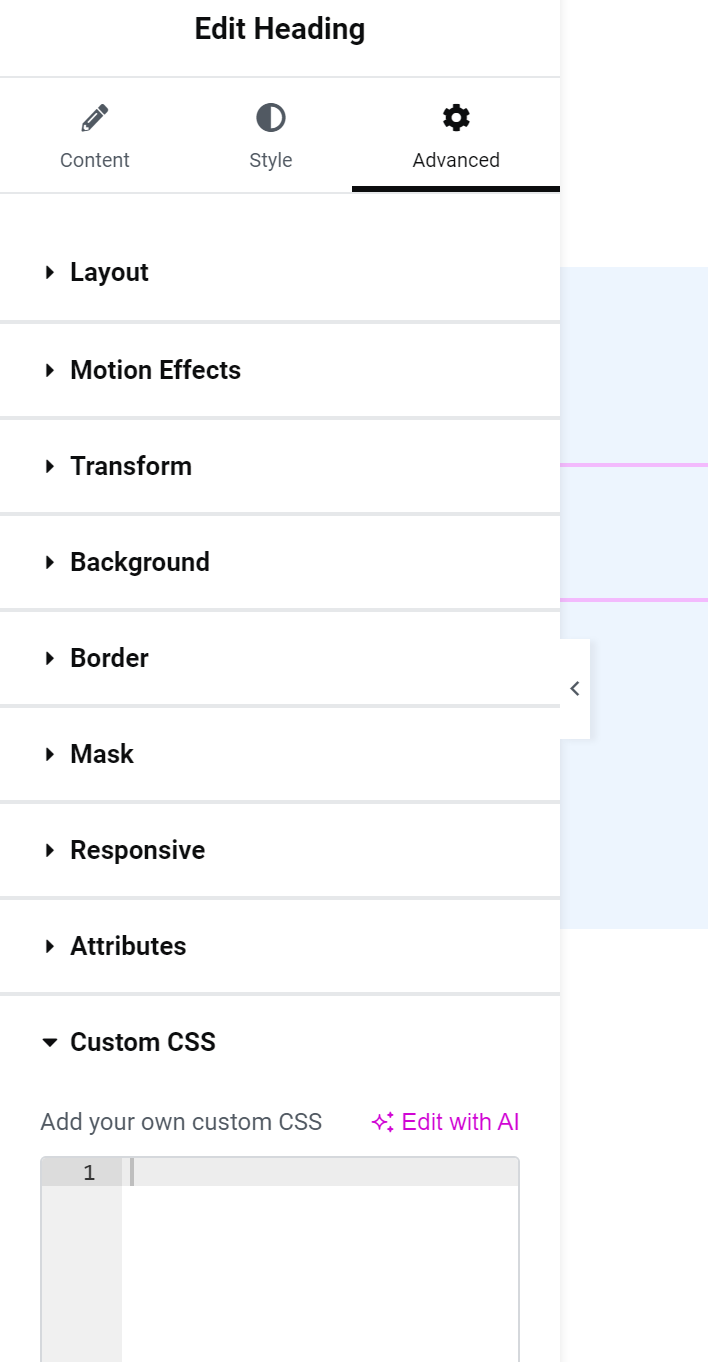
Step 1: While editing a page, select the element you want to style.
Step 2: In the “Advanced” tab on the left sidebar, find “Custom CSS” to add code specific to that element. It offers more control.

Both Elementor Free / Pro offer options to enhance your website’s aesthetics and functionality through custom CSS. Depending on your needs and the level of control you require, you can choose the method that best suits your web design goals.
Conclusion
In this guide, we’ve explored the power of custom CSS in Elementor, a versatile tool for shaping the visual identity of your website. Whether you’re using Elementor Free or have upgraded to Elementor Pro, the ability to add custom CSS opens up a world of design possibilities.
For Elementor Free users, the WordPress Customizer’s “Additional CSS” section allows you to make site-wide style adjustments. It’s a valuable starting point for those looking to enhance their website’s appearance.
On the other hand, Elementor paid offers advanced customization options. You can fine-tune the styling of individual elements, giving you precise control over your design. This premium feature is a game-changer for those seeking a tailored and professional look for their web pages.
With these methods at your disposal, you’re equipped to take your Elementor-based website to the next level. Whether you’re a casual blogger, small business owner, or web designer, the ability to add custom CSS in Elementor empowers you to create websites that not only look great but also align perfectly with your unique vision and brand identity. Happy designing!
How can I add custom CSS to Elementor?
You can add custom CSS in Elementor by selecting the element, navigating to the “Advanced” tab, and using the “Custom CSS” section.
Is custom CSS available in Elementor?
Yes, Elementor offers custom CSS functionality for fine-tuning your website’s styling.
How do I add custom CSS to free Elementor?
To add custom CSS in free Elementor, go to your WordPress dashboard, select “Customize” under “Appearance,” and use the “Additional CSS” or “Custom CSS” option.
How do I add inline CSS to Elementor?
To add inline CSS in Elementor, select the element, access the “Advanced” tab, find the “Custom CSS” section, input the element’s CSS selector in the “Selector” field, and add your CSS code in the “Declaration” field.


