How to integrate Elementor Form to Stripe | Complete Guide

Accepting payments online can be challenging, especially when you want to create a seamless and professional experience for your customers. If you’re using WordPress, Elementor Pro offers a fantastic way to build forms, but it lacks native support for payment gateways like Stripe. This is where integrate Elementor form to Stripe becomes essential.
Here are two needs to integrate Elementor form to Stripe.
Elementor: If you don’t already have Elementor installed, you can find it in the WordPress plugin repository and install it.
Elementor Pro: You may need the Pro version of Elementor for more advanced features, including the ability to create custom forms.
In this blog post, we will guide you through the process.
Step-by-Step Guide to integrate Elementor Form to Stripe
Fellow step-by-step guide to integrate Elementor form to Stripe.
Copy the API key in the Stripe Account
Step 1: If you don’t already have a Stripe account, create one at Stripe’s website.
Step 2: Once your account is set up, locate your API keys in the Stripe dashboard.
Add the API Keys to Elementor
Step 1: Elementor > Settings > Integrations.
Step 2: After entering each, click the Validate button to ensure it connects properly. Once finished, click the blue Save Changes button.
Create Your Form in Elementor
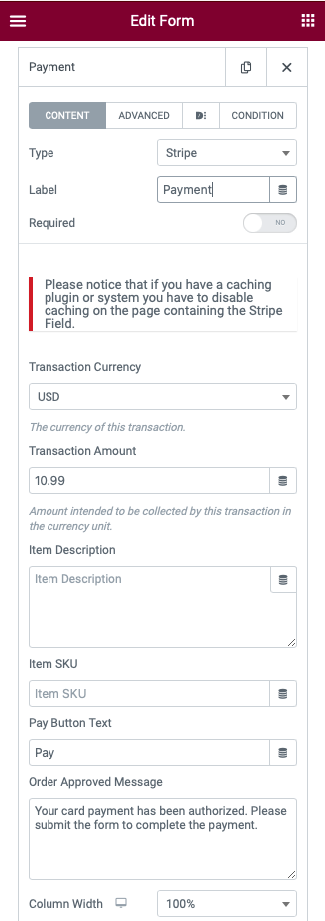
Step 1: Open a page or post in Elementor where you want to add the form. Drag and drop the Form widget from Elementor Pro into your layout.
Step 2: Add the necessary fields to your form as required. In the Elementor form widget, go to ‘Actions After Submit’.
Step 3: Configure the actions such as sending an email, redirecting to a thank you page, or other post-submission events.

Your form is now ready to accept real payments.
Important Notes:
- Security and Compliance: Ensure your website is secure and complies with PCI-DSS standards for online payments.
- Regular Updates: Keep your WordPress, Elementor, and all plugins up to date for security and functionality.
- Backup: Always back up your website before making significant changes.
conclusions
Integrating Elementor Forms with Stripe is a straightforward process that can significantly enhance your website’s functionality. By following these steps, you can create a smooth and professional customer payment experience. Remember, security and compliance with payment processing regulations like PCI-DSS are paramount. Regularly update your WordPress, Elementor, and plugins to ensure ongoing security and performance.


