
Have you found a way to add your Webflow site to Google Search Console
You’re off to a great start if you have a website built on webflow. But to ensure your website gets the visibility it deserves on Google, you should connect it to Google Search Console. This powerful tool allows you to monitor your site’s performance in Google search results, fix issues, and optimize your web presence.
In this guide, we tell you add your webflow site to Google Search Console in a few simple steps.
Add your Webflow site to Google Search Console (step by step)
Here is a step-by-step guide to add your webflow site to Google Search Console.
First, visit the Google Search Console website and sign in with your Google account. If you don’t have an account, you can create one easily.
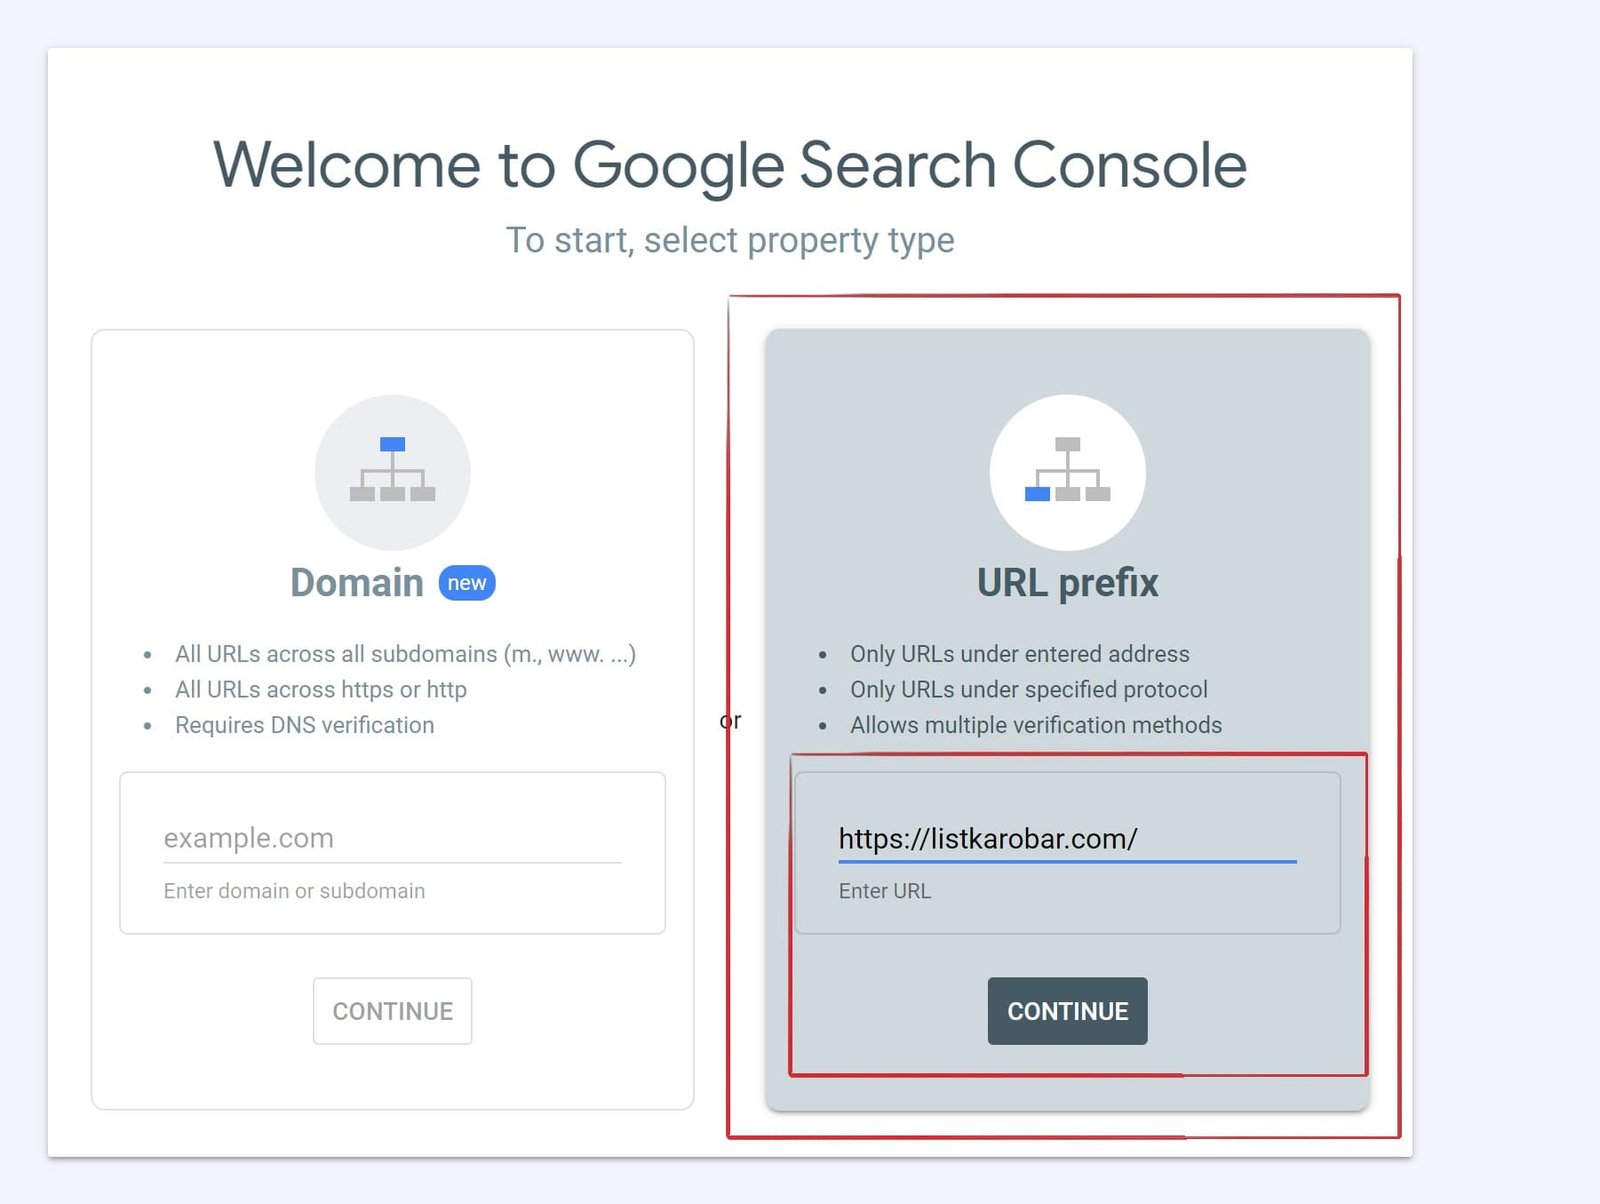
Step 1: Access Google Search Console, and add a new property. Enter your website’s URL, and click “continue.”
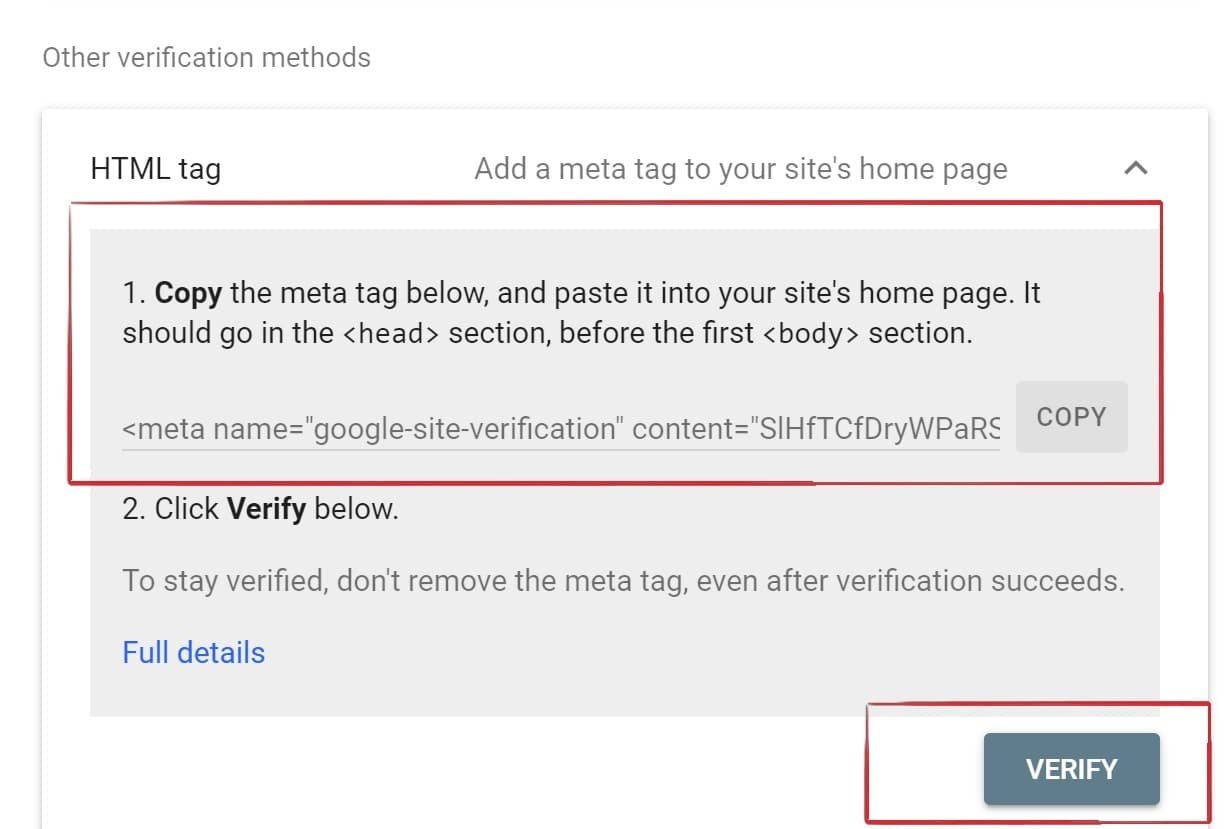
Step 2: Select the “HTML tag” verification method, copy the meta tag’s character sequence after “content=,” and keep this sequence in a text editor.
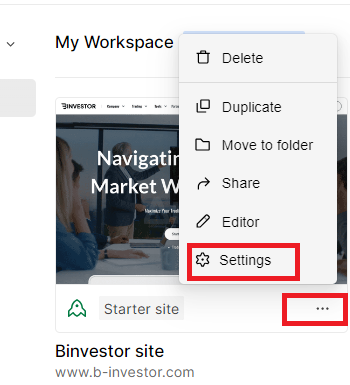
Step 3: Go to your Webflow project’s settings
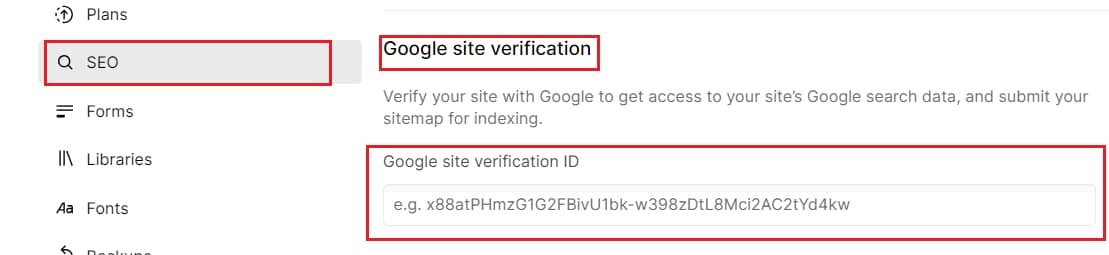
Step 4: Navigate to the SEO tab, paste the copied meta tag in the “Google Site Verification” section, and save the changes.
Step 5: Return to Google Search Console and click “Submit” next to “Submit later” to complete the validation.
By following these steps, you’ll successfully connect your webflow site to Google Search Console for monitoring and optimization.
Conclusion
Adding your webflow site to Google Search Console is crucial in improving its visibility and ensuring it ranks well in search results. This free tool provides valuable data and insights that can help you fine-tune your web presence, fix issues, and grow your online audience. By following these simple steps, you’re well on your way to making the most of your website’s potential in Google’s search ecosystem.