
Are you looking for a way to adding custom fonts in Elementor pro?
With Elementor pro, adding custom fonts and giving your website a unique touch is easier than you might think.
In this blog post, we’ll guide you through the simple steps to add custom fonts to your Elementor Pro website.
Before adding a custom font to your website, you’ll need to pick the font you want to use and add a custom font color. You can find a wide variety of free and paid custom fonts on the internet. Once you’ve chosen a font, make sure to download it to your computer.
Adding Custom Fonts in Elementor Pro
Here is a step-by-step guide to adding custom fonts in Elementor Pro.
Step 1: Go to WordPress dashboard > Elementor > Custom Fonts.
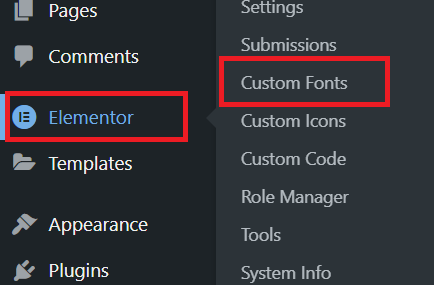
Step 2: Click “Add New.”

Step 3: Name your font and upload the font file. Open the Elementor editor, choose an element, and select your custom font.
Noted: You can download free font here with Variation: https://fonts.google.com/
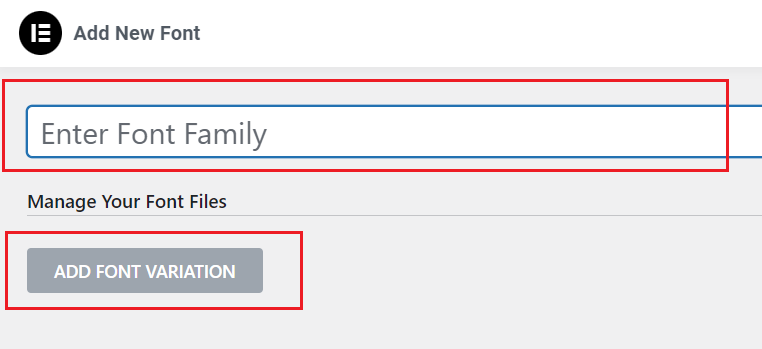
Step 4: Customize font size and style, then save your changes.
And that’s it! You’ve successfully adding custom fonts in Elementor Pro website. Now your website will stand out with its unique typography, and you can tailor your design to your brand or style.
Adding custom fonts to Elementor pro and disabling Google fonts is a straightforward process that can enhance the visual appeal of your website. Remember to choose fonts that align with your brand and style, and don’t go overboard with too many different fonts. Simple and elegant typography can make a significant impact on the overall look of your site.
So, go ahead, explore new fonts, and give your website a fresh, customized look with Elementor pro. Your visitors will appreciate the unique and appealing design you create. Happy designing!