How to Connecting Your Own Domain Name to wix
In today’s post, I’m going to show How to Connecting Your Own Domain Name to Wix even if you are a complete beginner, you will be able to do with step by step.
I’m going to cover the full process of purchasing a domain name from Namecheap and how to choose a paid plan in weeks and how we can connect the domain name with the website to give it a standard value.
You Might Also Like: How to add Alt Text in Wix
Connecting Your Own Domain Name to Wix
Let’s start purchasing the domain name. You can support us by using the below affiliate links.
Buy Namecheap Domain
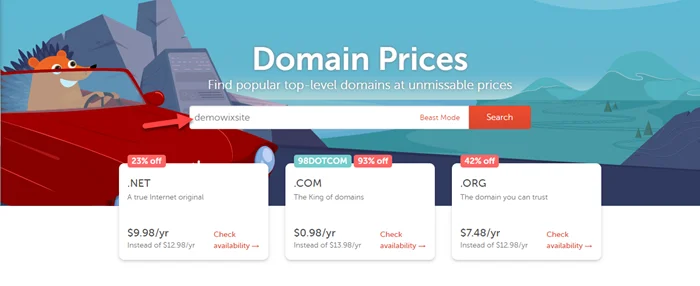
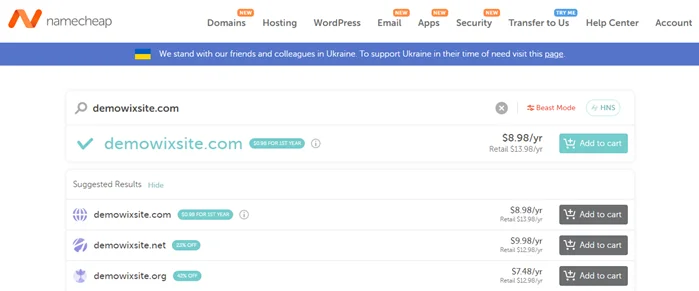
Step 1: Go to Namecheap and Search domain.
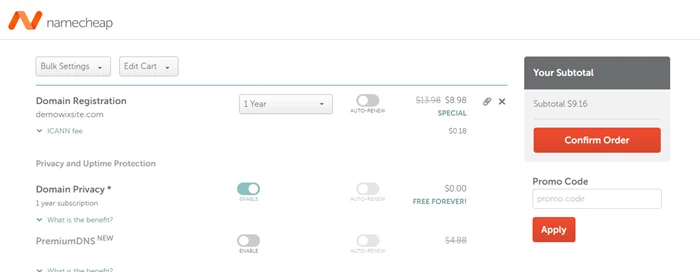
Step 2: Next Add to Cart domain > Checkout > Confirm order > Create Account and Pay
Connecting a Domain to Wix Using the Pointing Method
Step 3: Login to the Wix site dashboard > Settings > Click on Connect Domain.
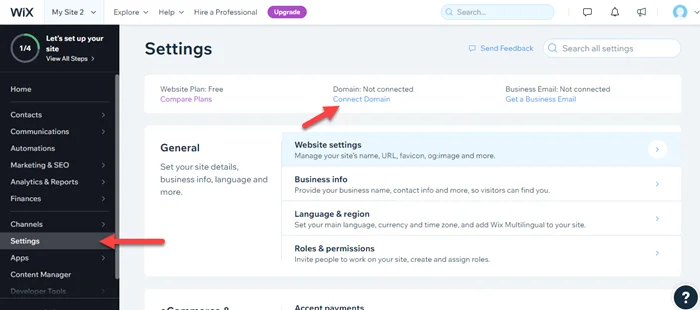
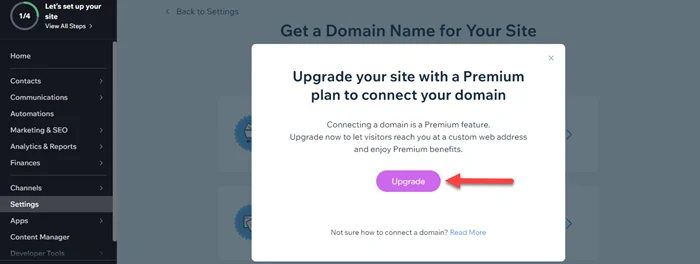
Step 4: Click on Upgrade.
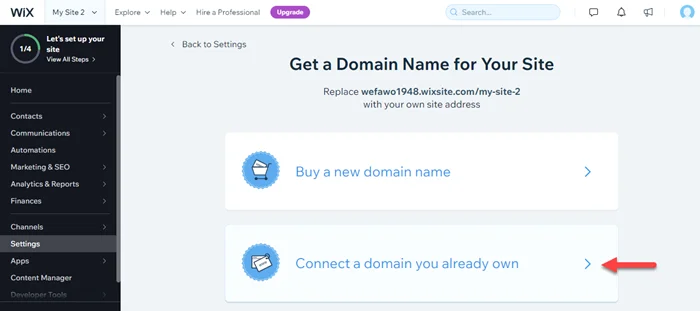
Step 5: Now click on “Connect a domain you already own“.
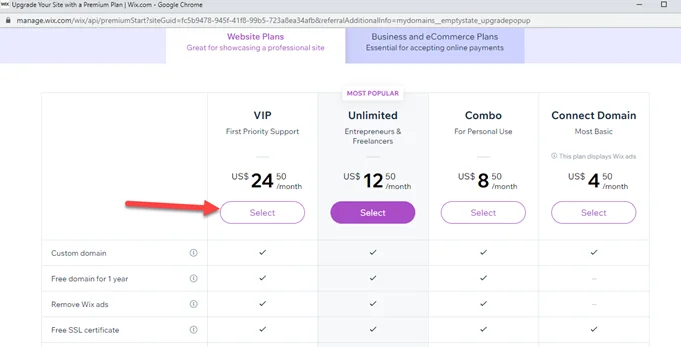
Step 6: Pick a plan that is suitable for your business.
Step 7: Click on “Continue to Checkout“.
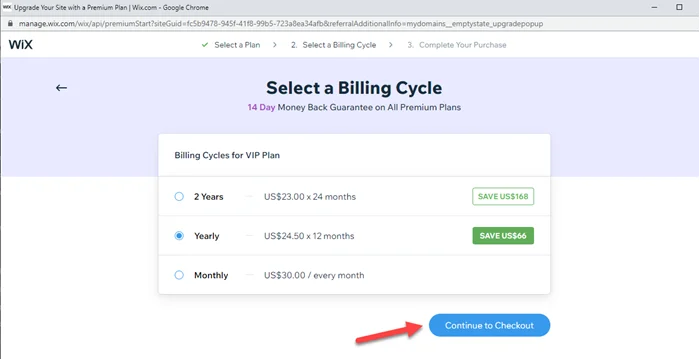
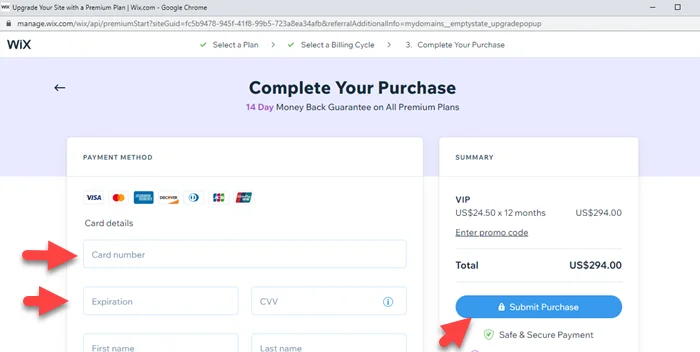
Step 8: Last “Submit Purchase“.
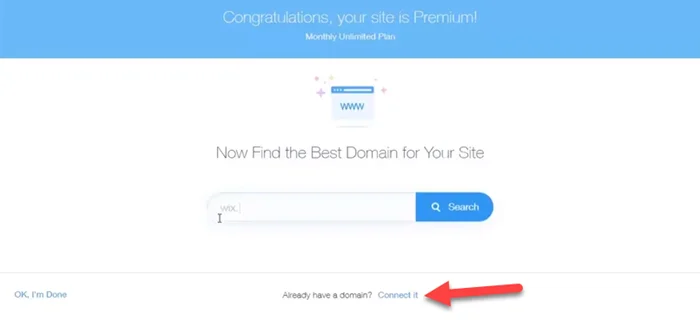
Step 9: Because we already buy a domain and now click on “Connect It“.
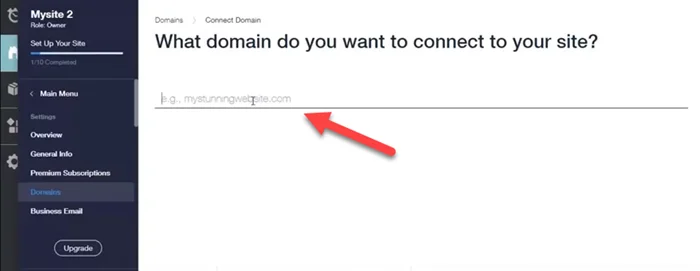
Step 10: Search the same domain here.
Step 11: Now click on “Yes, It’s from Namecheap“.
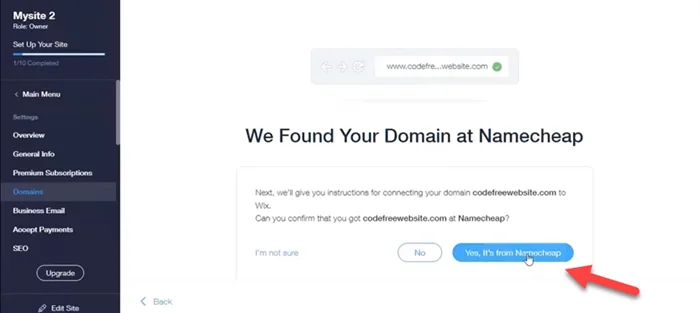
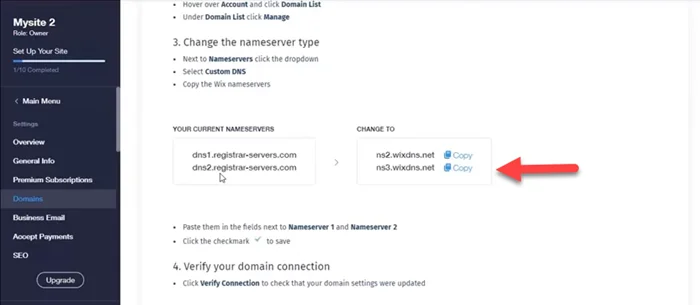
Step 12: Here you see some instructions and you can copy Wix nameservers.
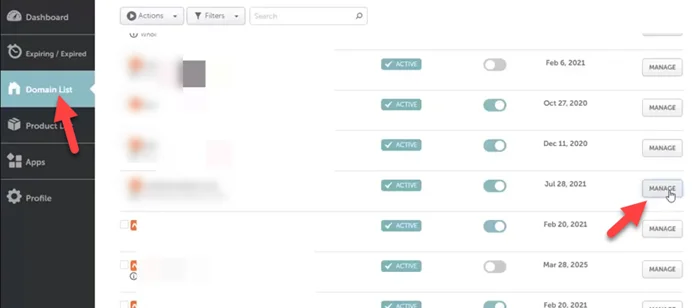
Step 13: Login to the Namecheap Domain > click on domain list > Choose domain > Click on Manage.
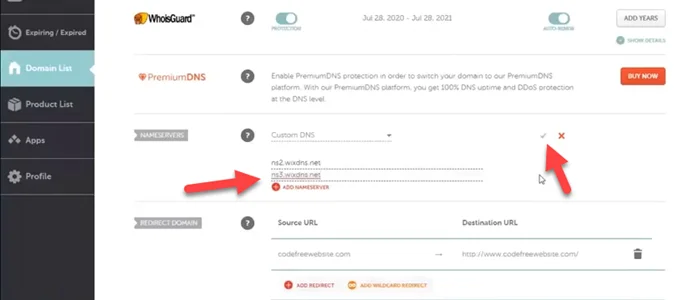
Step 14: Now pick a custom DNS and enter Wix DNS to Namecheap. Click on the green tick.
Step 15: Now click on “Verify Connection“.
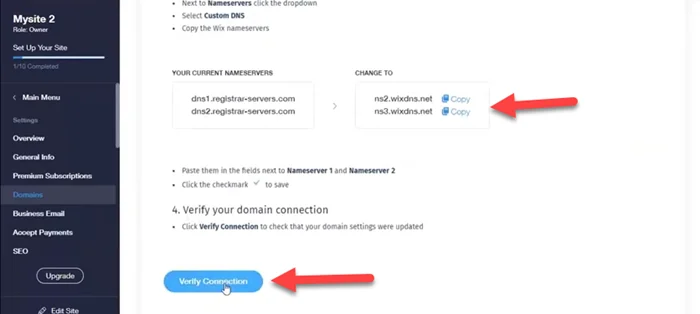
Step 16: Login to the Wix site dashboard.
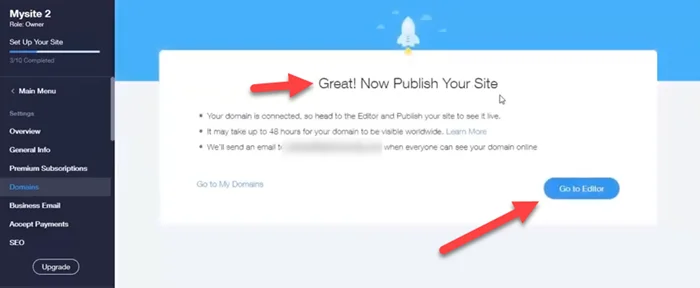
Step 17: Your work is done. It may take up to 48 hours for your domain’s new DNS records to propagate and your site to appear worldwide.
We hope this article helped you learn how to Connecting Your Own Domain Name to Wix. You may also want to get help from our Wix expert.
If you liked this article, then please subscribe to our YouTube Channel for web, windows, tech, and how-tos tutorials. You can also find us on Twitter and Facebook.
Frequently Asked Questions
Can I connect my Wix site to my own domain?
Yes, For this you just need to upgrade your Wix plan and buy Namecheap Domain. Last update nameservers and connect domain.
Is it better to buy a domain through Wix or GoDaddy Or Namecheap?
Yes, It is better to buy a domain through Wix but it is more expensive than GoDaddy or Namecheap.


