Four Steps to Create a Robots txt File for Your Website

Most newcomers don’t know how to create a robots txt for the website. Today, We will show you four steps to Create a Robots txt File.
Robots.txt is a simple text file to guide google robots on how to crawl site posts and pages on their website. The robots.txt file is also known as the robots exclusion protocol.
You Might Also Like: Free Keyword Research Tools
Four Steps to Create a Robots txt File
Step 1: Copy the below lines of snippet
User-Agent: *
Allow: /?display=wide
Disallow: /readme.html
Disallow: /refer/
Disallow: /wp-admin/
Disallow: /wp-login.php
Disallow: /cgi-bin/
Disallow: /trackback/
Disallow: /comments/
Disallow: /xmlrpc.php
Allow: /wp-admin/admin-ajax.php

User-agent: NinjaBot
Allow: /

User-agent: Mediapartners-Google*
Allow: /

User-agent: Googlebot-Image
Allow: /wp-content/uploads/

User-agent: Adsbot-Google
Allow: /

User-agent: Googlebot-Mobile
Allow: /

Sitemap: https://example.com/post-sitemap.xml
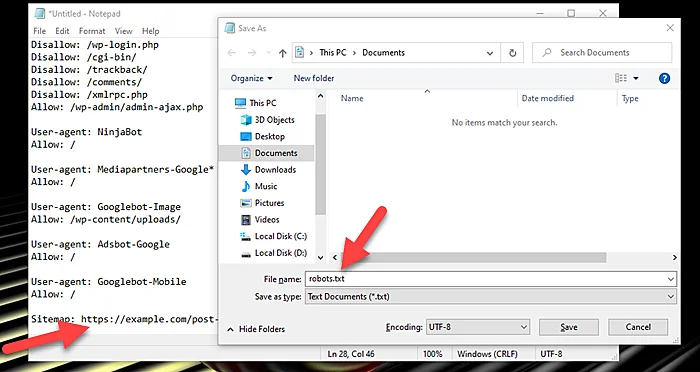
Step 2: Open notepad and paste the above code and save the file with the name “robots.txt”. Last, you must just change the sitemap URL according to your own website sitemap URL.

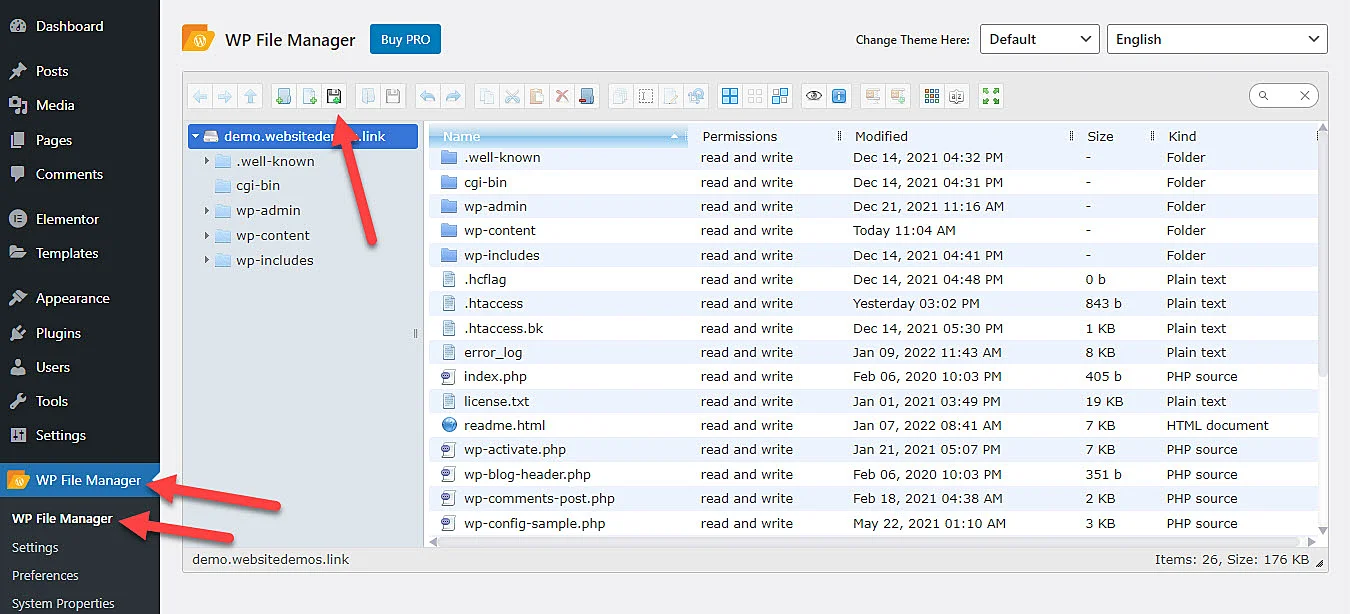
Step 3: Install and Activate File Manager plugin

Step 4: Now you should go to file manager and upload the robots.txt file into the root directory. Make sure this is placed outside the “wp-content” if you are using WordPress.


Watch Video
How do I Create a Robots txt File?
Step 1: Copy the below lines of snippet
Step 2: Open notepad and paste
Step 3: Upload robots.txt file into the root directory
Is robot txt necessary?
No, a robots.txt file is not required for a website.
You Might Also Like Cheap WordPress Design services for business.


