How to Create a Mega Menu in WordPress with Elementor Pro

Do you want to create a mega menu with amazing features and design options?
You can do it with Elementor Pro and its powerful Menu widget! In this tutorial, we’ll teach you how to design a mega menu for headers with Elementor that will impress your visitors and boost your conversions.
You’ll learn how to customize your mega menu, make it mobile-friendly, and use it for e-commerce purposes. Whether you need a simple or complex mega menu, Elementor pro covers you.
Ready to create your mega menu? Let’s dive in!
Download Elementor Mega Menu
What is a Mega Menu and Why You Need One
A mega menu is a large, expandable header menu that displays multiple sub-menus, categories, links, images, and other content in a single panel. Unlike a regular drop-down menu and multilevel menu in the header, a mega menu can show more information at a glance and help users find what they are looking for quickly and easily.
What Is a Mega Menu? A Comprehensive Guide for Beginners
A mega menu can benefit your website in many ways, such as:
- Improve user experience and navigation
- Increase the visibility and accessibility of your content
- Reduce the bounce rate and increase the time on site
- Enhancing the visual appeal and branding of your website
- Boosting SEO and ranking of your website
Create a Mega Menu in WordPress with Elementor Pro/Step-by-step Guide
To import the Elementor mega menu template, you must install the Elementor Pro plugin and activate Elementor’s new features. No need to create a custom mega menu, Mc Starters provides the pre-made mega menu header. You can just import it and enhance your WordPress site’s navigation.
Lastly, you need to follow these steps to import Elementor templates.
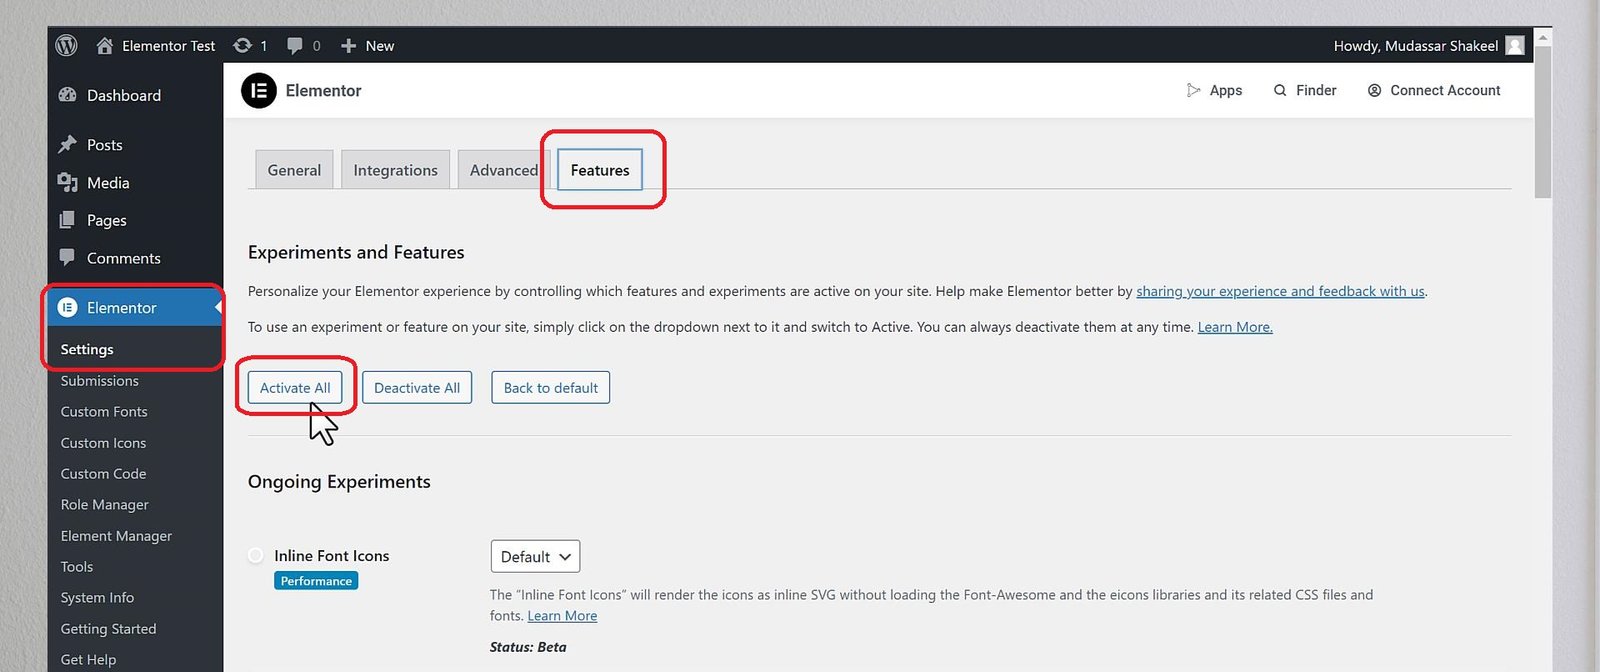
Step 1: Activate all Elementor new features.
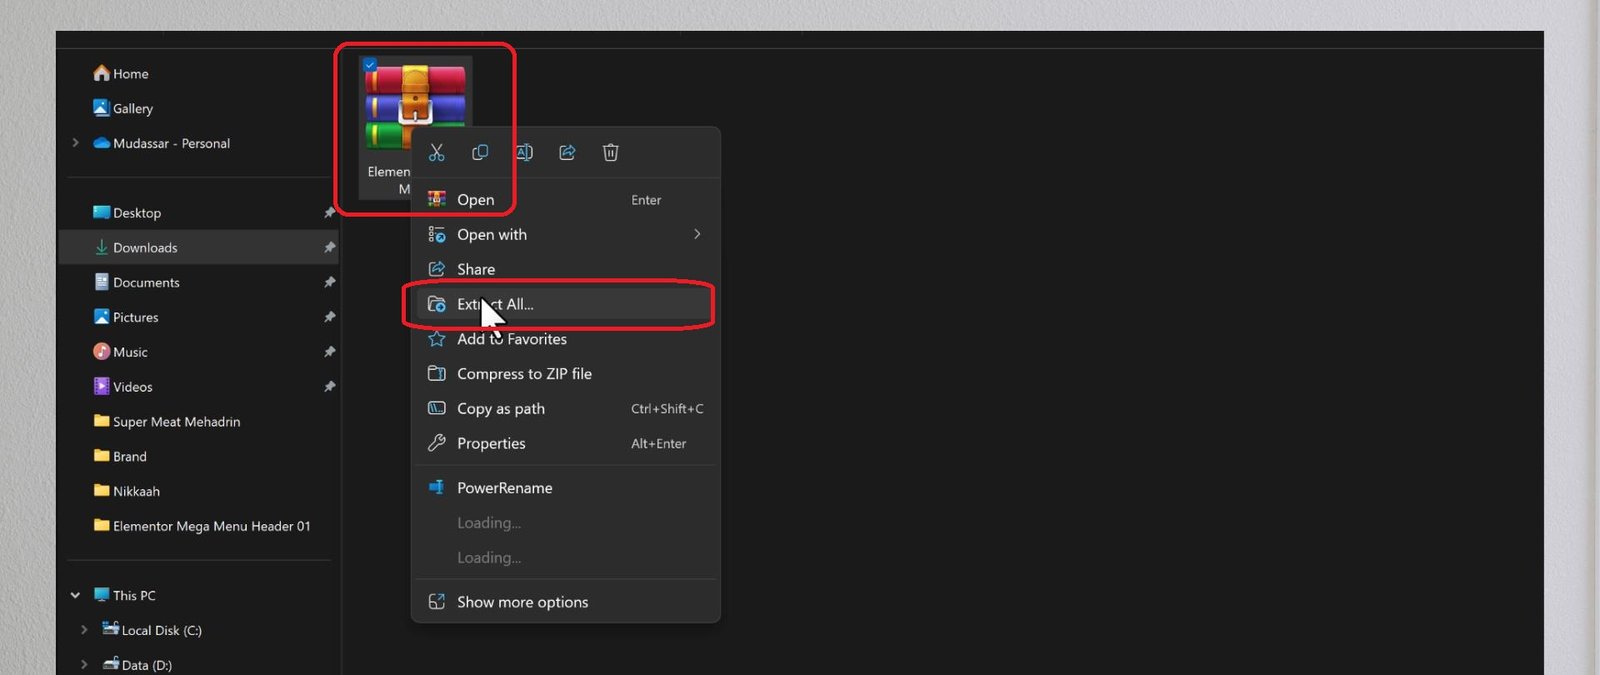
Step 2: Unzip download file
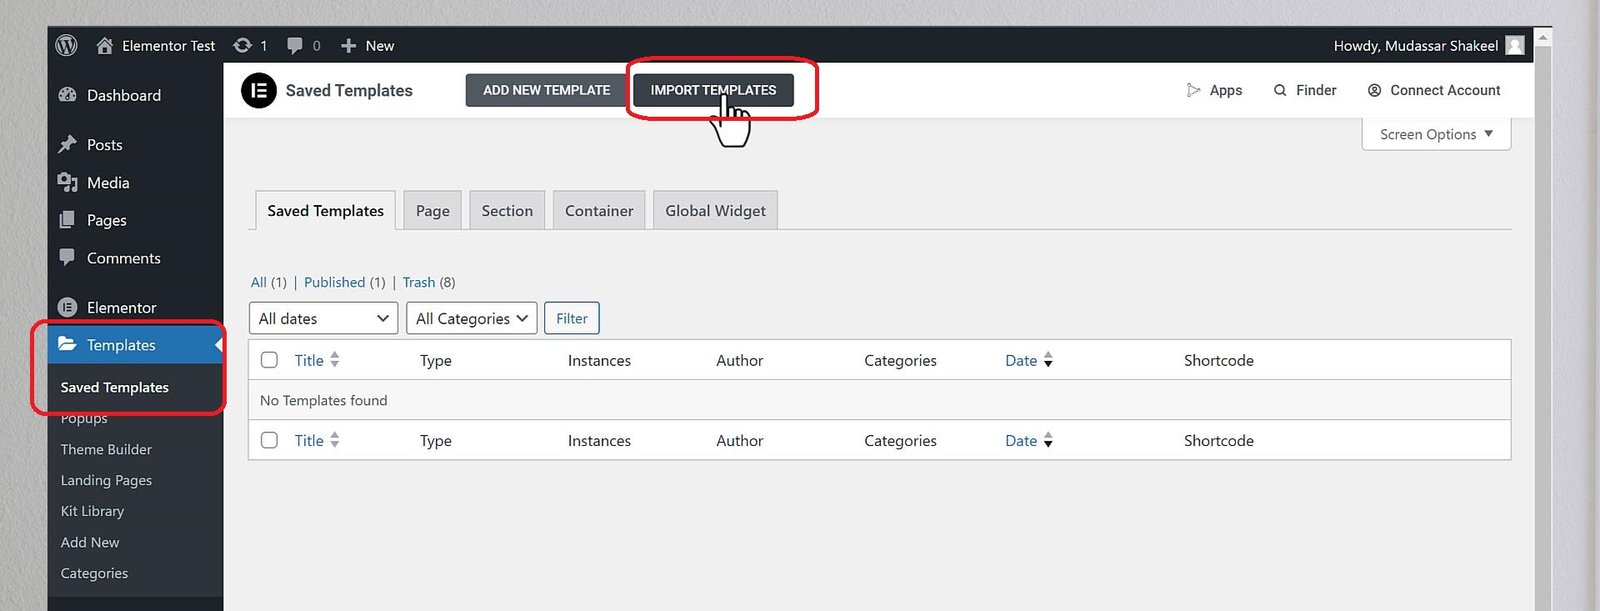
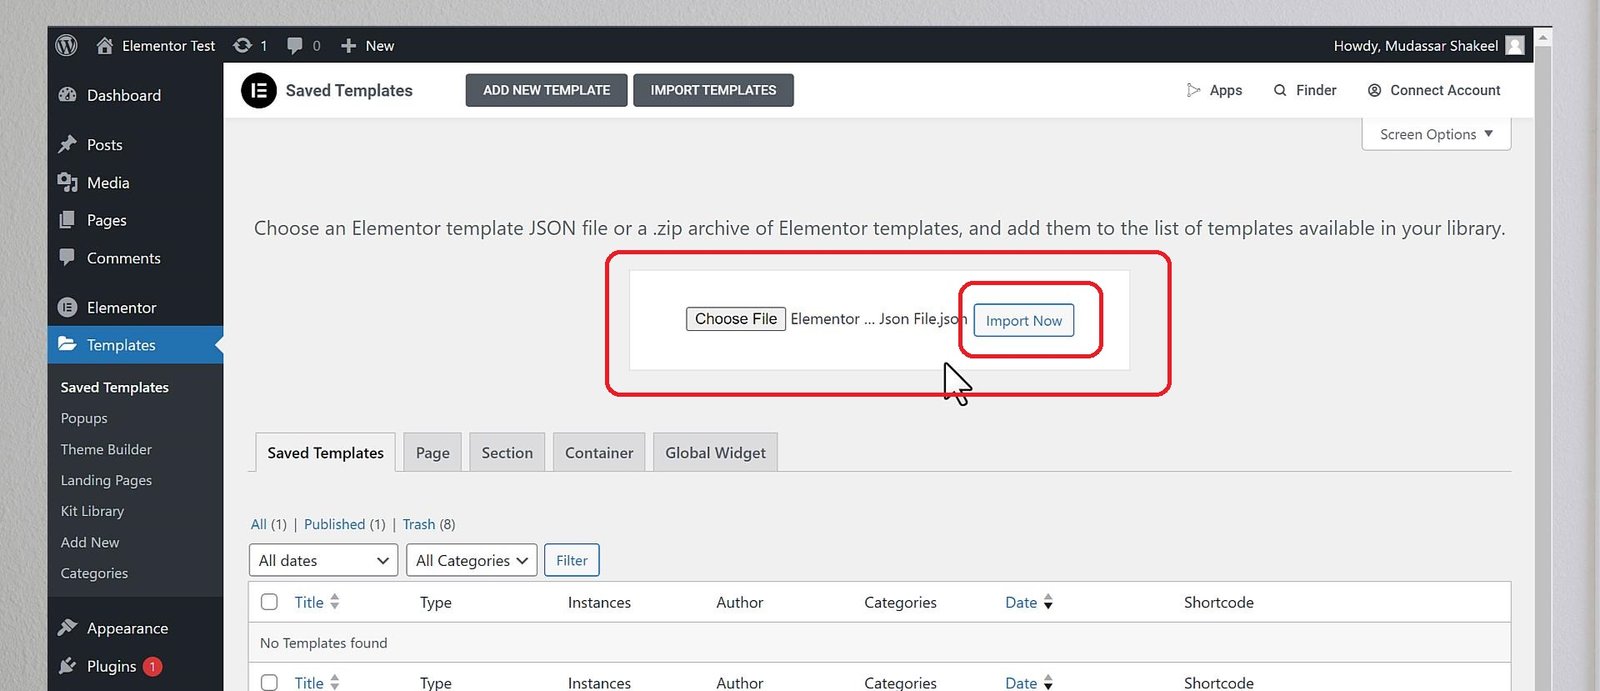
Step 3: Click on Templates > Saved Templates and Click on Import Templates.
Step 4: Find a JSON file and upload it.
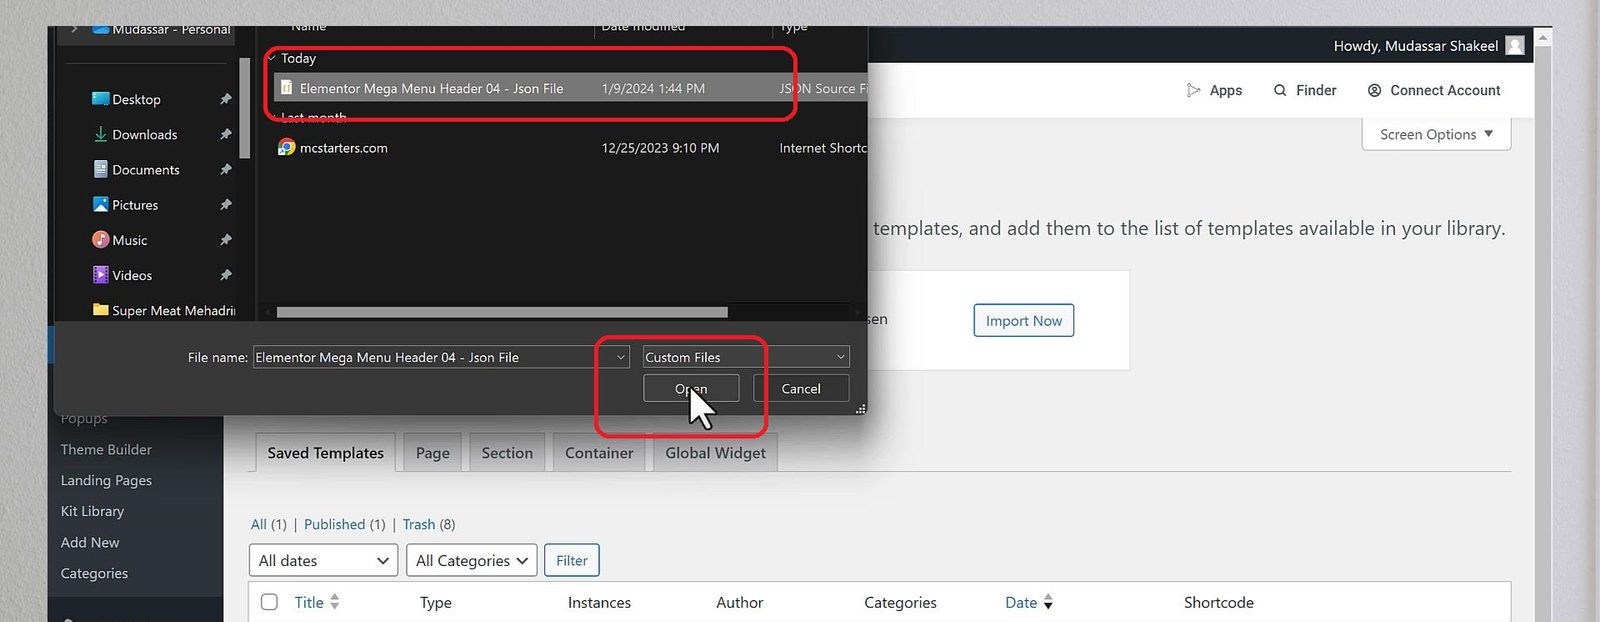
Step 5: After uploading click on Import Now.
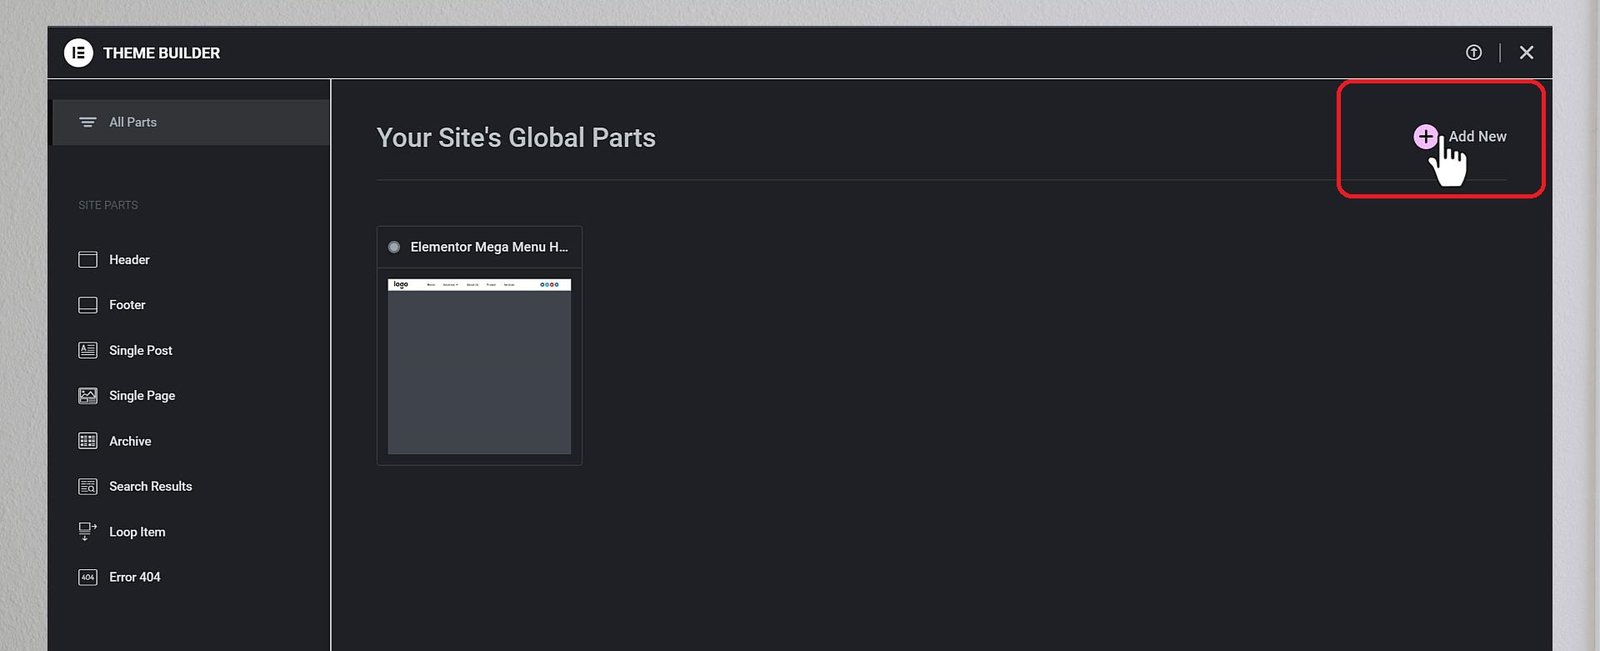
Step 6: To create a header, go to Theme Builder.

Step 7: Click on Add new.
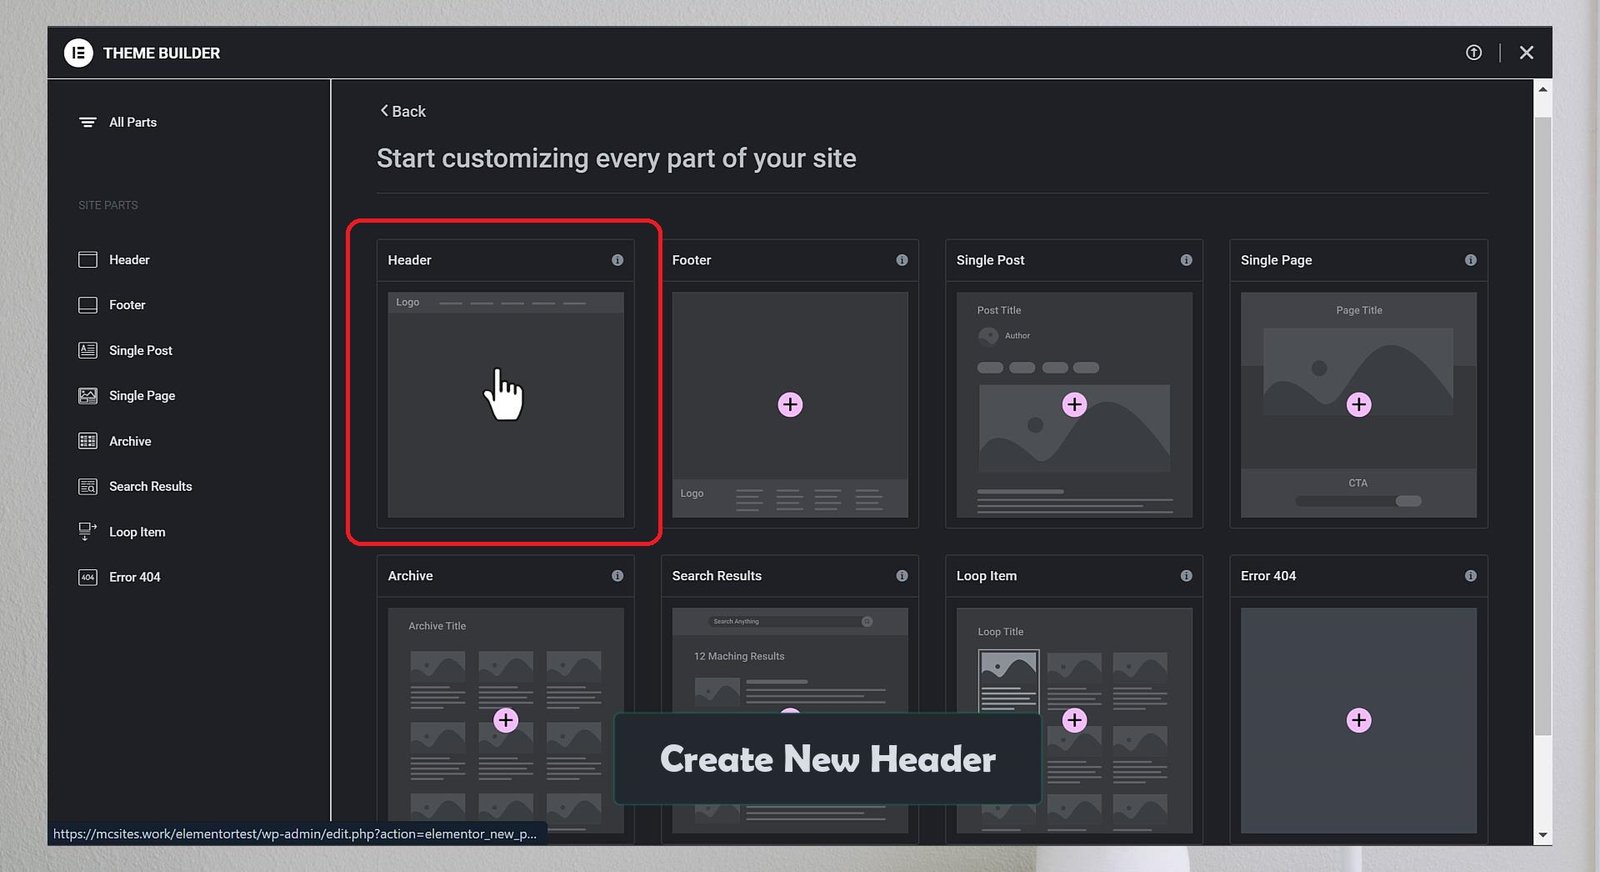
Step 8: Click on the Header box.
Step 9: go to my templates and click on insert to insert templates that were imported in the previous step.
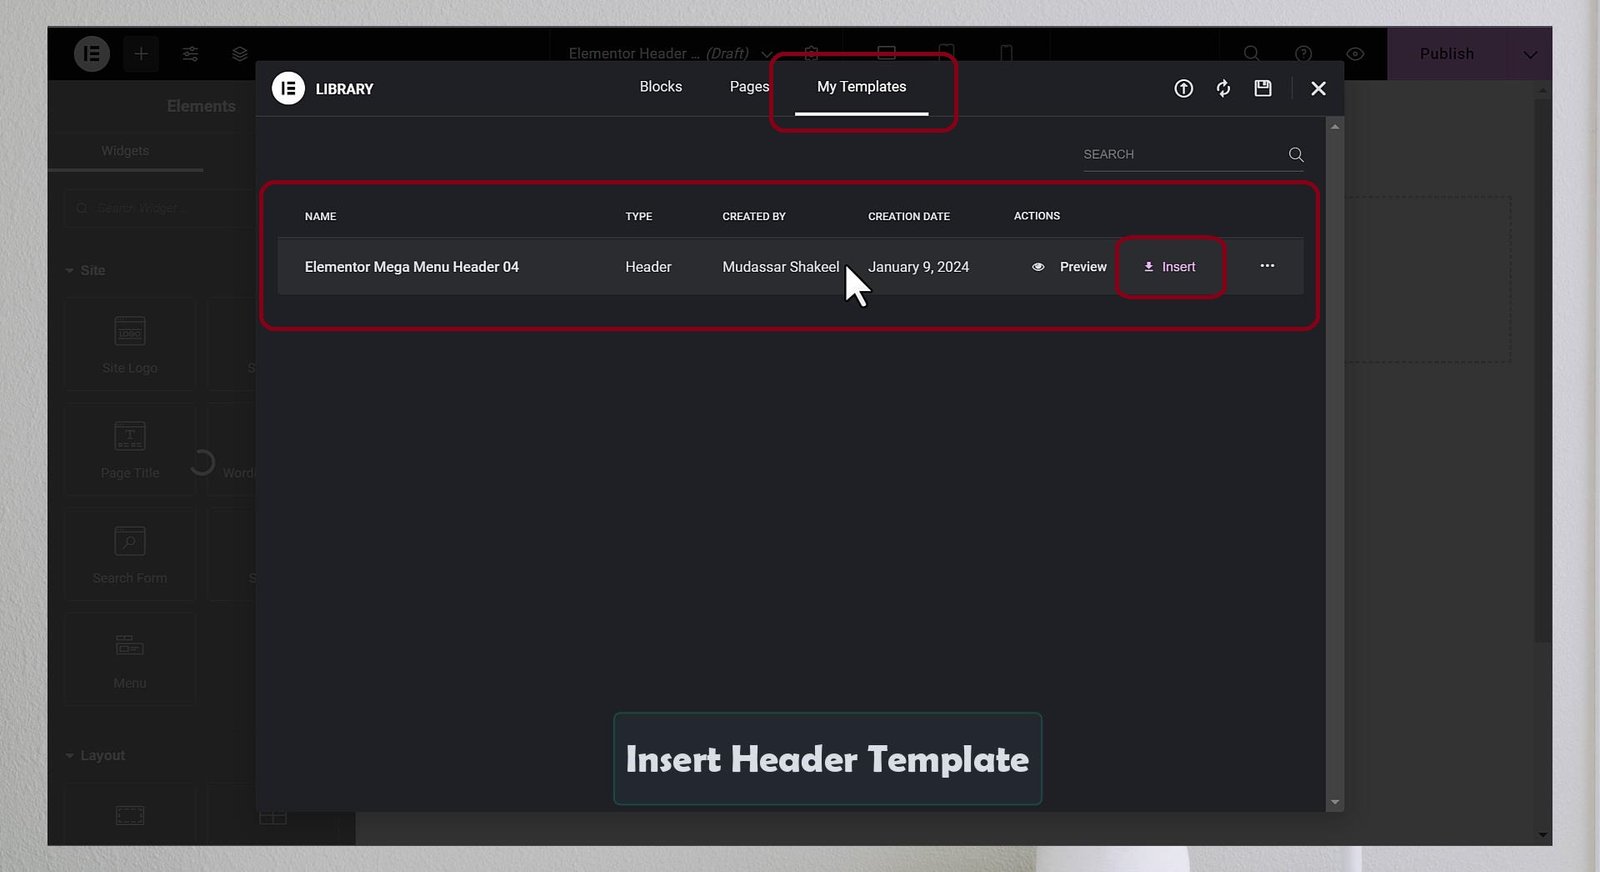
Step 10: After insertion, you see a header with a mega menu. Edit with Elementor, change, and text.
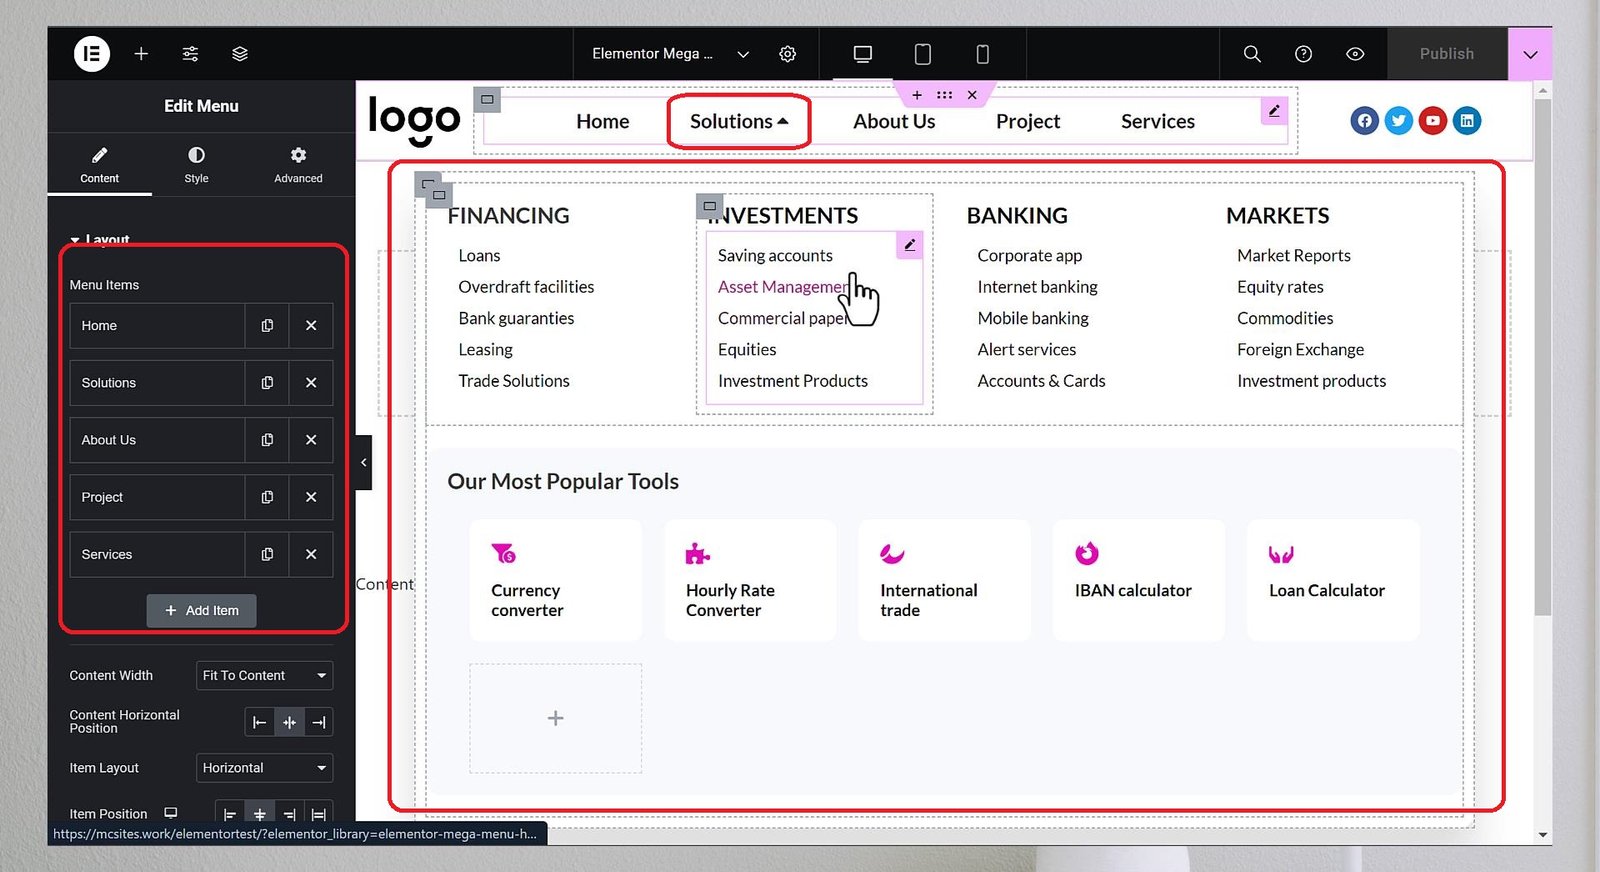
Step 11: Click on Publish.

Step 12: Set header condition entire site and click on save & close.
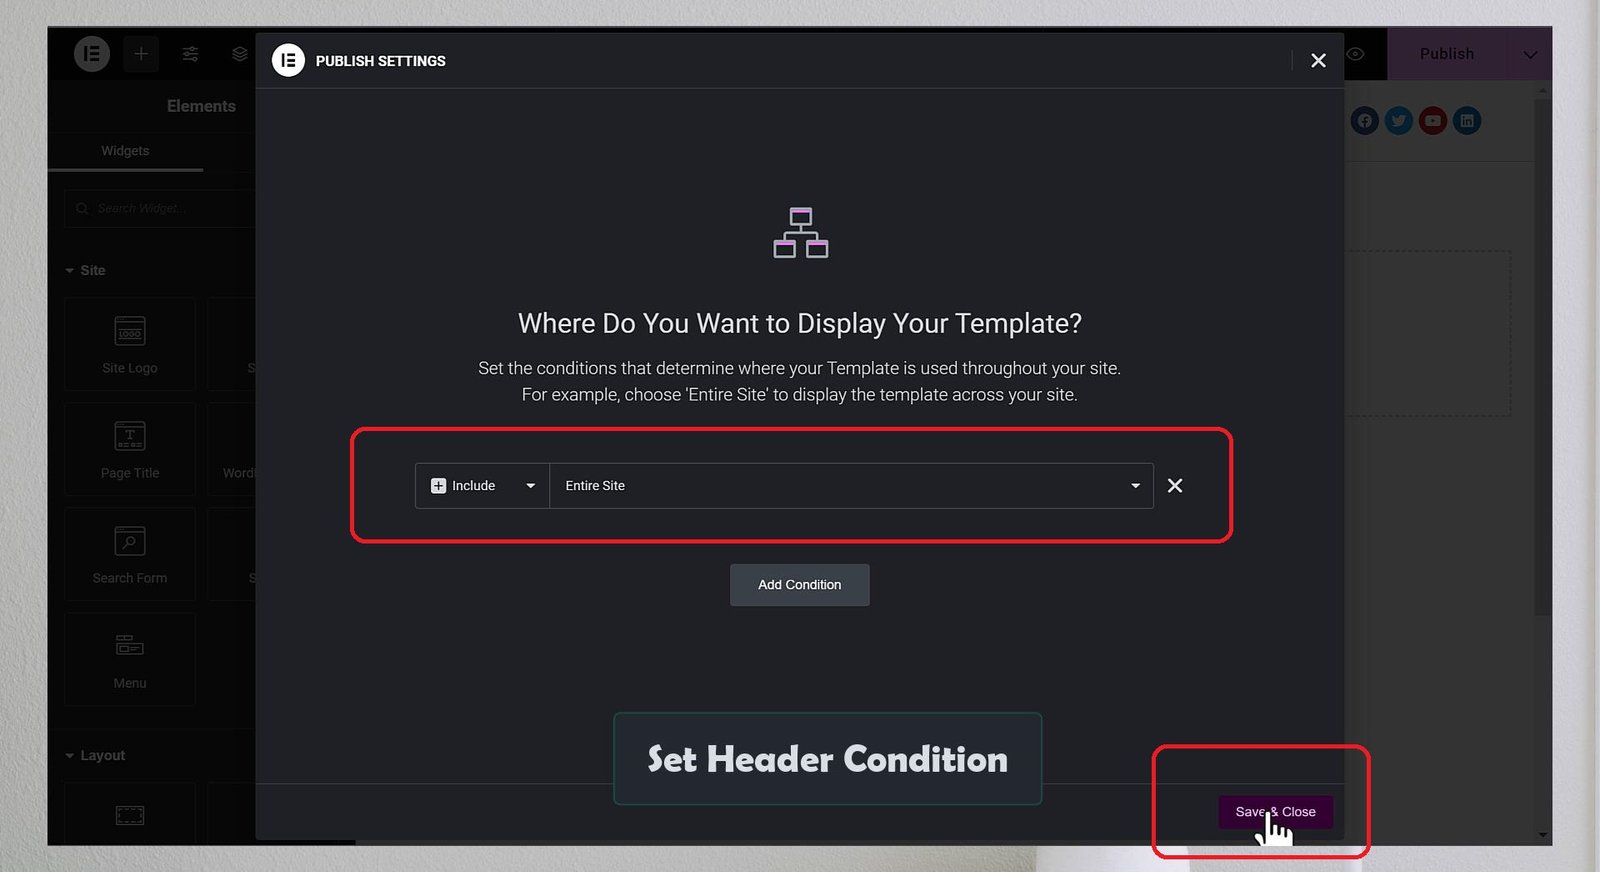
Step 13: Congratulations. now you see a new header with the mega menu on the website.

Mega Menu Design Best Practices
Now that you know how to create a mega menu in WordPress with Elementor Pro, here are some tips and best practices to help you design a better mega menu for your website:
- Keep it simple: Use headings, icons, and images.
- Ensure responsiveness: Adapt for different devices.
- Align with brand design: Match colors and fonts.
- Performance test: Check errors and optimize.”
Conclusion: Create a Mega Menu Without Any Plugins
Creating a mega menu in WordPress with Elementor pro is a great way to improve your website’s navigation, user experience, and conversion rate. You can use either Elementor pro or import mega menu from Mc Starters that suits your needs and goals.
A mega menu is a powerful feature that can take your website to the next level. With Elementor pro, you can create a mega menu that showcases your content, products, or services in a visually appealing and user-friendly way. You can also import a mega menu from Mc Starters that has been designed by professional designers and developers for various niches and purposes.
We hope this blog post helped you learn how to create a mega menu in WordPress with Elementor Pro. If you have any questions or feedback, feel free to comment below.
Happy creating! 😊


