
Are you looking for an easy way to delete site in webflow dashboard?
As a Webflow user, you know the platform’s power in creating and managing websites effortlessly. However, as your digital portfolio evolves, you may find the need to delete old or unused sites to keep your dashboard organized. In this guide, we’ll walk you through the simple steps to archive a Webflow site/ delete a site from your webflow dashboard without any hassle.
If you need help Hire Webflow Expert
Why do you need to Delete Site in Webflow Dashboard?
Deleting a site in webflow dashboard is typically done to manage and organize your workspace. It helps in removing old, unused, or test sites that are no longer needed and transferring to another account.
- Workspace Organization: Archive old or unused sites helps you maintain a clean and organized workspace within webflow.
- Focus on Active Projects: It declutters your dashboard, making it easier to focus on your current and active web design projects.
- Efficiency: Removing unnecessary sites improves workflow efficiency, especially for users managing multiple projects simultaneously.
- Resource Management: Deleting sites can free up storage space and other resources on your Webflow account.
- Test Sites Cleanup: It’s useful for removing test sites that were created for experimentation or testing purposes.
- Irreversible Action: Remember that site deletion in webflow is irreversible, so ensure you no longer need the site and back up any valuable data or design elements before proceeding.
First, copy the Webflow site then do the achieve the Webflow site. If you need in the future, you can use the save company of Webflow site.
Delete Site in Webflow Dashboard: Step-by-Step Guide:
Here’s a step-by-step guide on how to delete site in webflow dashboard. In this method, you permanently delete a site in Webflow’s dashboard.
Important Note: The “Delete” replacement action on Webflow sites is now “Archive.”
Step 1: Open your Webflow Dashboard.
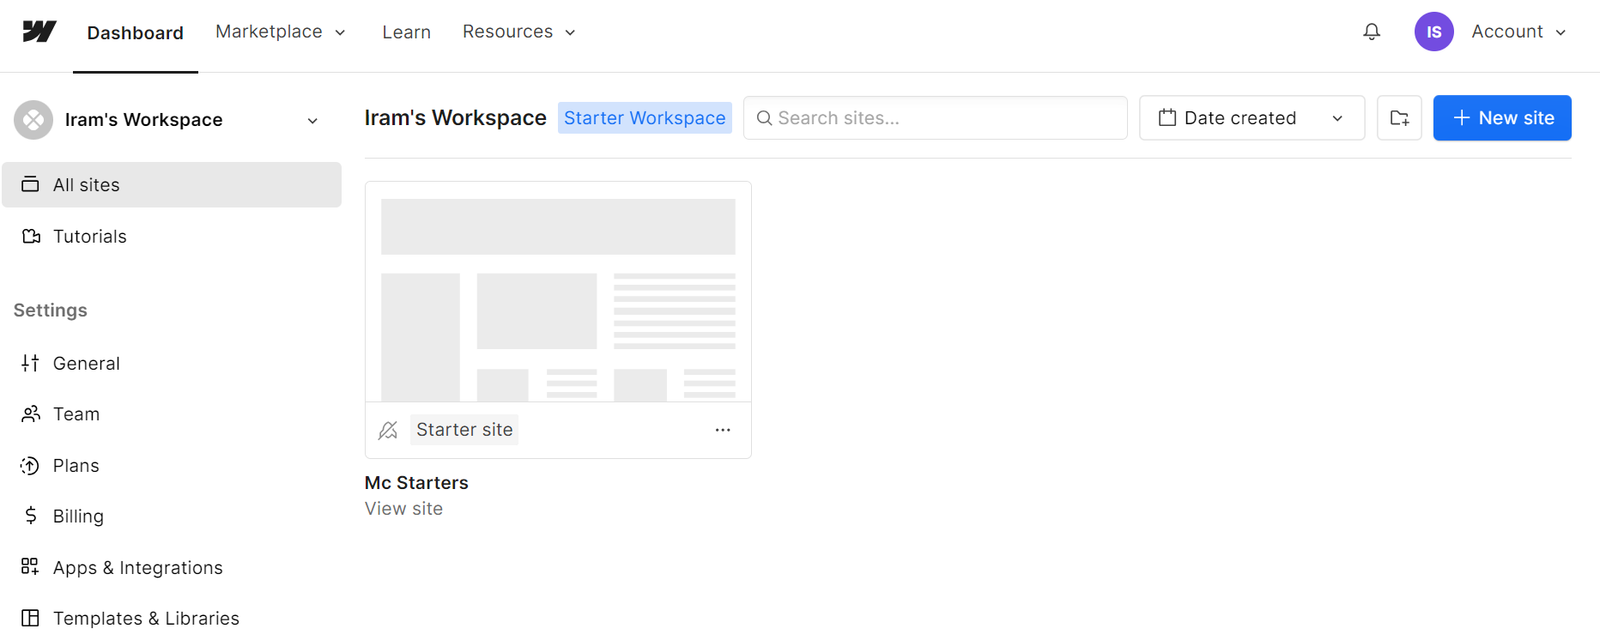
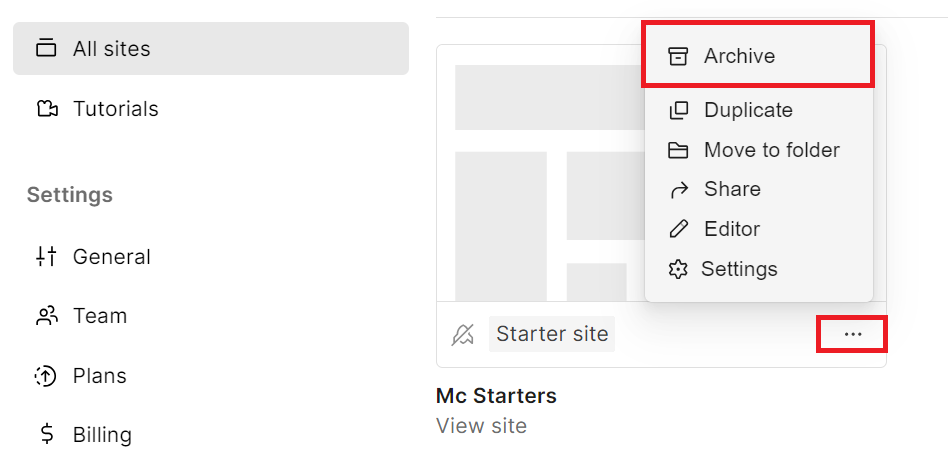
Step 2: Click on the 3 dots under your site’s thumbnail. Choose “Archive” from the menu.
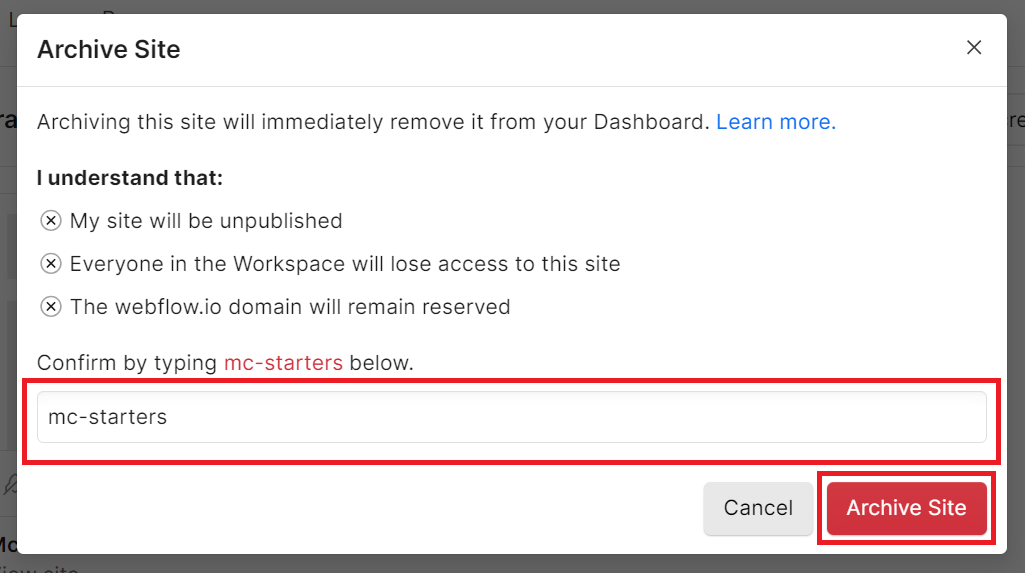
Step 3: Type in your site’s name to confirm and click “Archive site” in the modal (note: this action is permanent and irreversible).
Step 4: Congratulations! Your site has been successfully deleted or archive from your webflow dashboard.
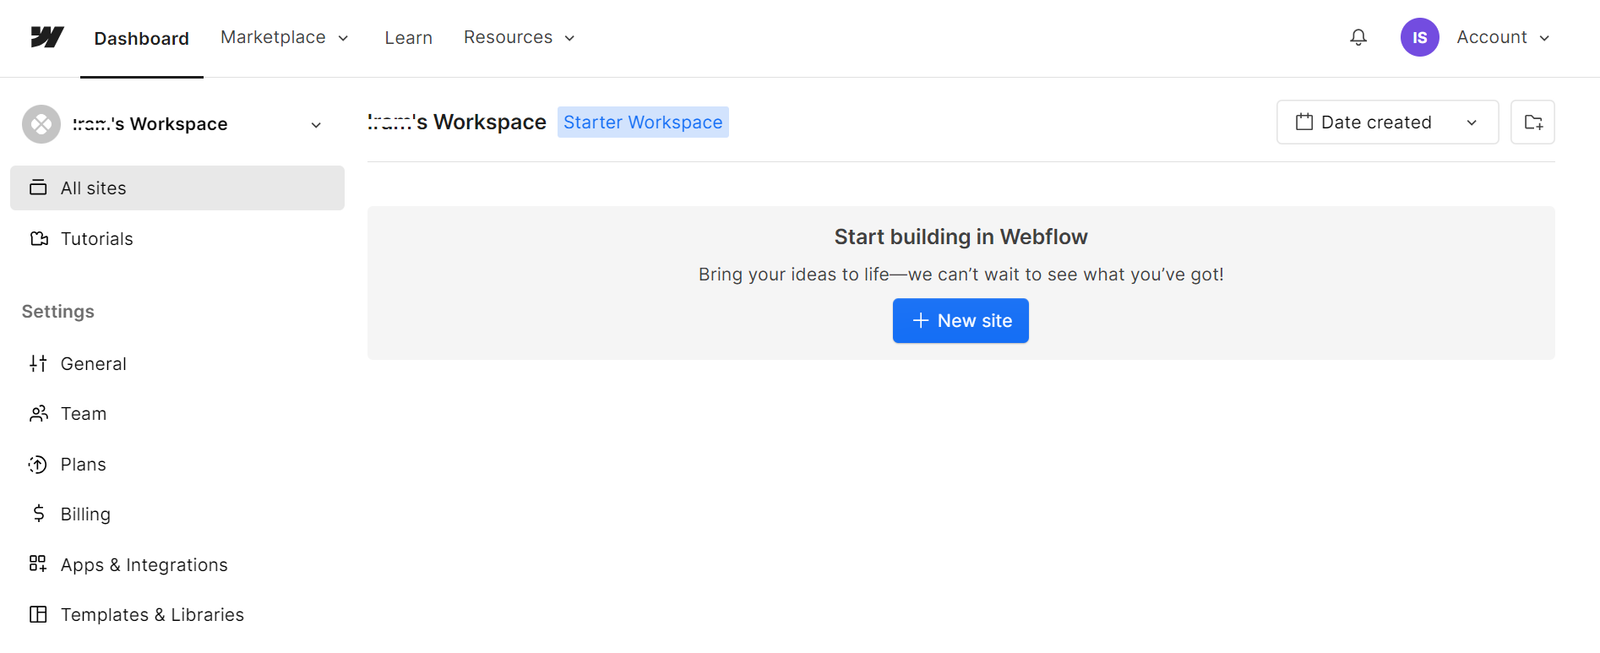
You’ll receive a confirmation message, and the site will no longer appear on your dashboard.
Conclusion:
Managing your webflow dashboard is essential for keeping your workspace organized and efficient. Deleting old or unused sites is a simple yet crucial step in this process. By following these easy steps, you can remove unwanted sites from your Webflow dashboard and maintain a clutter-free workspace for your current projects.
Remember, deleting a site is irreversible, so be certain before confirming the deletion. With these instructions, you can navigate the webflow dashboard confidently and declutter your workspace with ease.
Have you deleted a site in webflow before? Share your thoughts below!