
With the introduction of the new Flexbox Container element in the Elementor Page Builder 3.6, designing your website has become more flexible and efficient. This tool, replacing sections, columns, and inner sections in Elementor, enable flex container in Elementor to create attractive and responsive layouts quickly and easily, thereby enhancing your website’s performance.
The Flexbox’s page builder interface is user-friendly, making the transition smooth whether you’re new or switching from the old builder.
If you have questions about activating containers in Elementor, this guide will help you navigate through the process with easy-to-follow steps.
Enable Flex Container in Elementor Pro / Free
Here’s a step-by-step guide to enabling the Flex Container in Elementor (both Pro and Free versions)
Ensure that you have the Elementor plugin installed or updated to the latest version which supports the Flex Container feature.
Step 1: Go to “Elementor” > “Settings” and Features Tab.
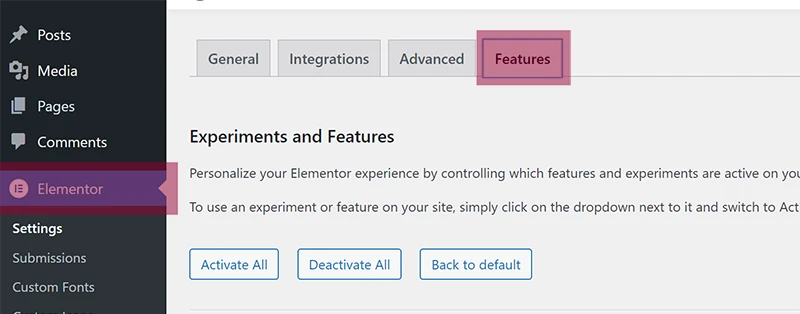
Noted: Here you can just click on Activate All if you want All Elementor new features.
Step 3: Scroll down and find the ‘Flexbox Container’ option and ‘activate’ it.

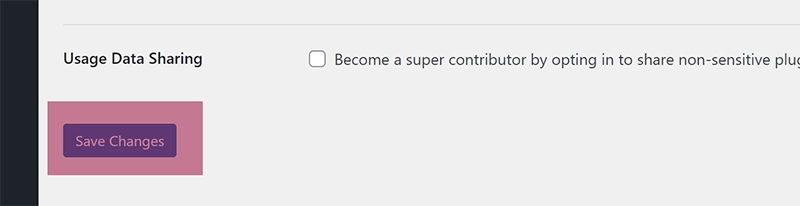
Step 4: Scroll to the end and save changes.
On new websites, the Flexbox container is active by default.
Conclusions
Enabling the Flexbox Container option in Elementor is a straightforward process. By following the above simple steps, users can effortlessly unlock more flexible and dynamic layout options for their website. It’s important to note that for those setting up new websites, this feature comes activated by default, making the process even more convenient.