What is User Management and How to Share Your Webflow Website Access

Are you inviting the editor to own websites and not know how to get Webflow website access?
User management is an essential aspect of maintaining and sharing your webflow website. It allows you to control who can access and make changes to your site.
In this blog post, we’ll break down the basics of user management in webflow and guide you through the process of sharing webflow website access without getting into complicated jargon.
What is User Management?
User management, in the realm of websites, is like having a master key to your digital kingdom. It’s all about controlling who can access and interact with your website. Whether you’re running a personal blog, an e-commerce store, or a collaborative project, user management helps you determine who can do what within your online space.
Think of your website as a dynamic house, and user management as the set of keys you distribute to different people. Each key grants access to specific rooms or functions. For instance, you might want to give some users access to edit content (like a writer), while others need full control (like an administrator).
Why User Management Matters
Now, you might be wondering, “Why is user management so important?” Here are a few compelling reasons:
- Security: User management helps you safeguard your website. By controlling who has access, you reduce the risk of unauthorized changes or data breaches.
- Collaboration: If your website involves multiple contributors or team members, user management allows for seamless collaboration. You can grant different levels of access to suit various roles and responsibilities.
- Efficiency: With the right user management system, you can simplify tasks like content editing, design changes, and even financial transactions. This streamlines your website’s operations.
Webflow Website Access: A Step-by-Step Guide
One of the key benefits of user management in webflow is the ability to share access with team members, clients, or collaborators. Whether you’re working on a design project, managing content, or seeking feedback, granting access is a breeze. In this section, we’ll walk you through the process of sharing your webflow website access.
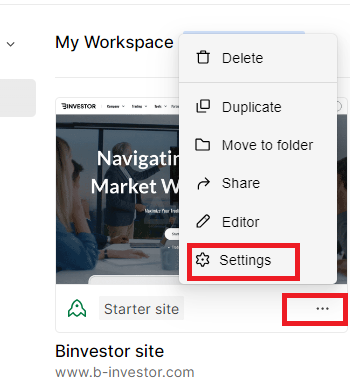
Step 1: Log in to your Webflow account. Select your project. Navigate to “Project Settings.”

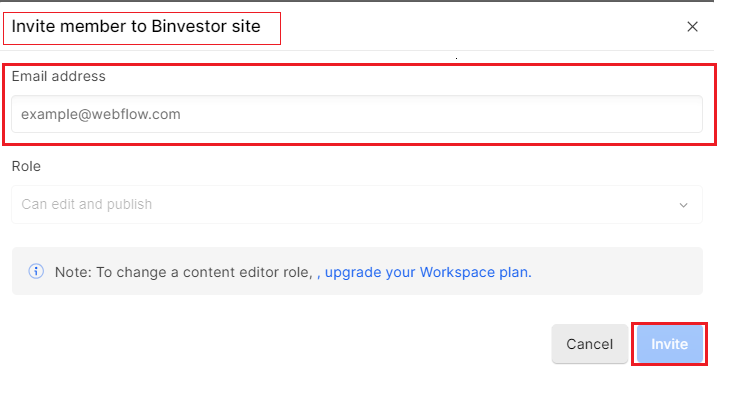
Step 2: Click on “Site access.” Open the “Add content editor” option.

Step 3: Enter the email addresses. Send the invitation.

Sharing webflow website access is a straightforward process. By following these steps, you can invite team members and collaborators to work seamlessly on your project. Whether you’re designing, developing, or managing content, this feature makes collaboration a breeze. Enjoy the benefits of teamwork while maintaining control over your website.
Final Thoughts
User management in webflow is a simple and effective way to collaborate with others while maintaining control over your website. By following these straightforward steps, you can invite team members and grant them the appropriate permissions to work on your project.
Remember, keeping things easy and straightforward in user management helps ensure a smooth and secure collaboration process. So, go ahead and invite your team members to start working together on your Webflow project!
How can I access user management in Webflow?
To access user management in webflow, log in to your account, select your project, navigate to “Project Settings,” and click on “User Management.
Can I change the roles and permissions of users after sending the invitation?
Yes, you can modify the roles and permissions of users even after sending the invitation. You have control over the level of access users have at any time.
Is sharing Webflow website access secure?
Yes, sharing webflow website access is secure. By using user management, you can regulate who can access your project, which helps maintain security and control.


